Saturday, December 29, 2012

12 Favorite Recipes of 2012 & The Most Popular Post of the Year!

2013 is almost here! Do you have big plans for New Years eve? Parties perhaps? An evening at home watching the ball drop? I can't believe I have had this little blog for nearly a year now. Time sure does fly by fast! My first post was on New Year's day last year! In the spirit of the new year, I thought it would be fun to post my 12 favorite recipes of 2012, and at the bottom of this post, you'll see what the most popular post of the year was! 

Starting this blog was a great decision. It brings me great joy to take pictures and try new foods, and I learn something new everyday. I am so grateful for anyone who has taken a second to look at my little corner of the web. I have a long way to go, and I hope you stick around for the journey. See you next year!


This was a truly beautiful salad, and was totally different from the norm. Before this salad, I had never had beets or fennel. Needless to say, I greatly enjoyed both, and I can't wait until blood oranges are in season to enjoy this salad again!


I have probably made these cookies about twenty times this year. I am always so happy when I make them, because they turn out perfectly every. single. time. I'm pretty sure they're Chris' favorite as well! :)


A goal I had this year was to learn how to make homemade bread. I did the best I could while I was in China using my "easy bake", and I was still able to produce this beautiful loaf while I was over there. I was able to do it, and you can too! I plan on making this again for St. Patty's day, along with some sort of Irish stew.


It is no secret that I am in love with leeks. These toasts only deepened my love for them. They were so SO creamy and flavorful, and incredibly simple. Oftentimes less is more, and this recipe is a perfect example.


Another perfect example that less is more. This shrimp takes only a few minutes to prepare and is very healthy and flavorful. I am making a promise with myself to eat more fish and less meat this year, so hopefully I can bulk up my seafood section in the recipe index! 


This is hands down my favorite granola. There's not really much else to say, other then don't skip the banana. Make this.


These were the first fritters I ever made, and they definitely stand out in my memory. More fritter recipes are on the horizon for 2013! 


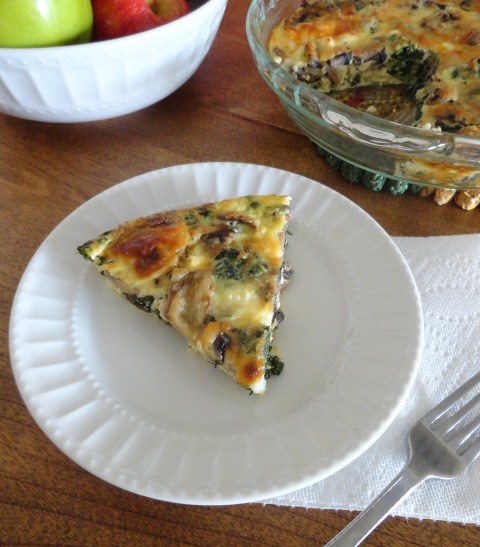
It is no secret that I am a lover of Indian food. I seriously need to amp up the Indian recipes on this blog to reflect that! This dal is definitely a favorite, and is part of my regular rotation. I always have canned tomatoes and lentils on hand for this recipe. It's cheap (great for broke grad students!) and takes about 30 minutes to make, with barely any hands on time. Perfect for a busy week night!


Chocolatey, buttery, and delicious, this was a favorite when I was growing up. Who doesn't love warm gooey chocolate cake!?


I loved these peppers. These would be great for my gluten free pals! (Hey Erin and Katelyn!!) I actually just remembered I still have some filling left in the freezer. Score! 


I loved baked pasta, it's just so comforting and filling! This was simple to prepare and very delicious, perfect for a cold winter day! I know it looks a bit odd in the pics, but as I mentioned in the post, I kind of messed up the second pan. Freeze unbaked!


These are hands down one of the best muffins I've ever had. All the wonderful elements of fall are wrapped up into a handful of deliciousness! These will be repeated many times for sure!

Last but not least, this was the most popular recipe on the blog this year:


I'm not sure if this cookies popularity was because of they're tastiness or lots of pinning on pinterest, but this recipe has had more page views then any other recipe on this blog. Full of caramely goodness, they are also one of my favorites!

Again, thanks for stopping by. See you next year with even more cooking and delicious food!

Tuesday, December 25, 2012

Merry Christmas!

Merry Christmas everyone! The ornament you see in the picture holds a photo of me and my sister sitting on Santa's lap when we were little. It is  one of our favorites. I have had a wonderful day eating and playing games with my family. I hope your day was also filled with happiness, joy, and of course, delicious eats! Cheers!

Saturday, December 22, 2012

Dark Sticky Gingerbread


It would not be Christmas without gingerbread, molasses cookies, or gingerbread men. Out of all the flavors that are associated with holiday baking, I think the combination of molasses and ginger is my favorite. This gingerbread was wonderful and full of flavor and spice. With the exception of about 3 or 4 pieces, I'm pretty sure I nearly ate the whole pan! I halved the recipe to fit a 9 x 9 baking dish, so I wasn't too bad, right? I can also say with absolute confidence that the bread tastes even better the next day, especially with a hot cup of tea. Nummy!

Dark Sticky Gingerbread

Ingredients

1 cup unsalted butter
1/2 cup water
3/4 cup unsulphured blackstrap molasses

3/4 cup honey
1 cup tightly packed dark brown sugar 

3 cups all-purpose flour
1 1/2 teaspoons baking soda 

1/2 teaspoon salt 

2 teaspoons ground ginger 

2 teaspoons ground cinnamon 

1/2 teaspoon allspice

1/4 teaspoon ground cloves

3 large eggs, at room temperature

1/2 cup milk

1 packed tablespoon grated fresh ginger root

Directions

Preheat the oven to 325F, with a rack in the center. Butter and line a 13x9x2-inch baking pan so the parchment hangs over by a couple inches. This will help you remove the cake from the pan later on. 

Combine the butter, water, molasses, honey and brown sugar in a medium saucepan and place over low heat. Stir the mixture frequently until the butter is just melted, and all of the ingredients are well blended. Remove from the heat, pour into a large bowl and set aside to cool. Do not refrigerate.

Meanwhile, combine the flour, baking soda, salt, ginger, cinnamon, all-spice and cloves, and set aside. When the molasses mixture feels just warm to the touch, add the eggs, one at a time, mixing well after each addition. Add the milk and stir to combine. Fold the dry ingredients into the batter, but don't over mix. Some lumps are okay! Stir in the grated ginger.

Pour the batter into the prepared pan and bake for 45-60 minutes. Start checking for doneness after about 45 minutes. When the top of the cake springs back when touched you're good. 

Allow the cake to cool for 10 minutes, then, using the overhang of parchment (if you're using a rectangular pan), lift the cake out of the pan and cool completely on a wire rack before cutting. 

Recipe Source: adapted from 101 Cookbooks, who adapted it from this book

Saturday, December 15, 2012

Raspberry Coconut Thumbprint Cookies

All semester I have been promising to bring some sort of baked good to work. Unfortunately I was swamped this semester, so that didn't happen until I was finished with finals (YAY!). I actually had something else in mind to bake, but I saw these little gems and couldn't resist. Is there anything better then toasted coconut? I'm not sure there is! These cookies were delightfully chewy and buttery, and I just loved the raspberry/coconut combination (raspberry zingers anyone??). I'm so excited to finally have a little more time to do some baking. Hooray for Christmas break!!

Raspberry Coconut Thumbprint Cookies

Ingredients

3 sticks unsalted butter, at room temperature
1 cup sugar
1 teaspoon vanilla extract
3 1/2 cups all purpose flour 
1/4 teaspoon salt
1 egg beaten with 1 tablespoon water, for egg wash
7 ounces sweetened flaked coconut
Raspberry jam (supposedly apricot jam is tasty as well!)

Directions

Preheat oven to 350F. 

Cream together butter and sugar until they are just combined, then add the vanilla. In a separate bowl, sift together flour and salt, then slowly add to the creamed butter/sugar mixture. Mix until the dough starts to come together. Dump onto a floured board and roll into a flat disc. Wrap in plastic and chill for 30 minutes.

Remove the dough from the refrigerator. Roll the dough into 1 1/4 in balls. Dip each ball into the egg wash, then roll it in coconut. Place the balls on an ungreased cookie sheet (I lined mine with parchment just to be safe), and press a light indentation into the top of each with your finger, or use the back of a 1/2 teaspoon measuring spoon. Drop roughly a 1/4 teaspoon of jam into each indentation. Bake 20-25 minutes,* until the coconut is golden brown. Cool and serve.

*Mine were done at 18 minutes, so check early just to be safe!

Recipe source: adapted from Barefoot Contessa Family Style

Saturday, December 8, 2012

Chupe de Pollo con Chipotle


Yesterday was the last day of school for the semester. Thank. Goodness. I have been looking forward to this break for a while, and am so happy that I will soon be free of work and school for a few weeks. I have nothing on the agenda except for practicing, a few crafty things, and cooking and baking. LOTS of baking actually, so stay tuned! What are your favorite things to bake during the holidays?

Though I'm not on Christmas break yet (I have a paper and a project due, as well as a few other smaller assignments), I did want to devote some time to cooking today. I have eaten out way too much this week, because I did not prepare for such a hectic schedule! 

I made this soup when we were in China, and have been aching to make it for the longest time. It's incredibly hearty, and full of wonderful flavor, that really comes together at the very end. It isn't a great recipe for a weeknight meal, as it can be a little time consuming, but is worth the effort. Honestly, for me, It felt very therapeutic to chop and stir, and enjoy a little down time at home. 

P.S. the soup looks a little Christmas-y with all the red and green, right? :)    

Ingredients

1 (7-ounce) can chipotle chiles in adobo sauce
1 teaspoon olive oil
2 cups onion, chopped
1 cup carrots, chopped
1/2 cup celery, chopped
1 teaspoon ground cumin
1/2 teaspoon dried oregeno
1/2 teaspoon dried thyme
6 cloves garlic, crushed
6 cups chicken stock
1 1/2 lbs. boneless skinless chicken breasts or thighs
2 medium red potatoes (about 12 ounces), diced into 1/2 inch pieces
1 (15.5 oz.) can white or golden hominy, rinsed and drained
1/4 cup whipping cream (I used milk, and it was fine, though I think I prefer it with cream)
1 cup chopped, seeded tomatoes
1/4 cup cilantro, chopped
1/2 teaspoon salt
8 lime wedges

Directions

Remove 1 chile and 1 teaspoon adobo sauce from can. Finely chop chile; set chile and sauce aside separately.

Heat oil in a large Dutch oven over medium heat. Add chopped chile, onion, and next 6 ingredients (through garlic). Cook 7 minutes or until onion is tender, stirring frequently. Stir in broth, and bring to a boil. Add chicken; cover, reduce heat to medium-low, and simmer 30 minutes or until chicken is tender. Remove chicken with tongs or a slotted spoon, and cool slightly. Shred chicken with 2 forks or pull apart by hand; cover and keep warm.

Remove pan from heat; let stand 5 minutes. Place one-third of broth mixture in a blender; process until smooth. Pour pureed broth mixture into a large bowl. Repeat procedure in two more batches with remaining broth mixture. Return pureed broth mixture to pan. Stir in potatoes and hominy, and bring to a simmer over medium heat. Cook, uncovered, 20 minutes or until potatoes are tender. Stir in chicken and cream; simmer 5 minutes. Remove from heat, and stir in reserved adobo sauce, tomato, cilantro, and salt. Serve with lime wedges.

Recipe Source: adapted from Cooking Light

Thursday, November 29, 2012

Baked Orzo with Eggplant and Mozzarella

Can you believe it's almost December? I definitely can't. I feel like I just got back from China last month, and that school just started. Nevertheless, I will gladly welcome December, as that means more time for cooking and baking, blogging, and eating!

Anyhoo, I made this baked orzo weeks ago, and it was stellar. It also reheated beautifully. I have never really had great success with eggplant in my cooking, so I was incredibly pleased that it turned out this time. Loaded with veggies, this pasta is flavorful, filling, and satisfying.

Ingredients

1 large (1-1 1/4 lbs) eggplant, cut into 3/4-inch dice
Salt and black pepper
1/4 cup olive oil
1 medium carrot, peeled and cut into 1/4-inch dice
1 celery stalk, in a 1/4-inch dice
1 medium onion, finely diced
3 garlic cloves, minced
8 ounces orzo, a rice-shaped pasta, rinsed
1 teaspoon tomato paste
1 1/2 cups vegetable stock
1 to 3 tablespoons fresh oregano, chopped. If using dried oregano, use half as much.
1 teaspoon grated lemon zest or more to taste, up to the zest of a whole lemon, or you can use 1-2 tablespoons lemon juice
4 ounces mozzarella, firmer is better here, cut into 1/3-inch dice.*
1 1/2 ounces (a generous 1/2 cup) Parmesan, grated
3 medium tomatoes, diced

Directions

Sprinkle your eggplant generously with salt and let it drain in a colander for 30 minutes. During this time, prep the remaining ingredients. After 30 minutes, rinse it well and pat it dry with paper towels.

Preheat your oven to 350°F. Heat a large frying pan or dutch oven over medium-high heat. Once hot, add the oil and once the oil is shimmering, add the eggplant. Fry for 8 minutes, stirring pieces occasionally. Using a slotted spoon or spatula, transfer them to paper towels to drain. Add celery and carrots to remaining oil and cook for 3 minutes before adding onion and garlic. Cook together for 5 more minutes on medium heat. Stir in the orzo and tomato paste and cook for two minutes more. Remove from heat. Add the oregano, mozzarella, parmesan, tomatoes, fried eggplant, lemon zest, 1 teaspoon table salt, many grinds of black pepper and the stock and mix well.

Transfer mixture to an 8×11-inch (about 2 quarts) ovenproof baking dish. Cover with foil and bake 20 minutes, then bake 20 minutes without the foil. Let rest for 5 minutes before serving.

*I used grated mozzarella, without any problems.

Recipe Source: adapted from Smitten Kitchen

Sunday, November 25, 2012

Cranberry Orange Pumpkin Muffins

I just got home after what was a loooong day of driving. Did anyone else deal with major traffic in the middle of nowhere? I sure did, and am so glad I'm finally out of the car. Travel aside, I thoroughly enjoyed my trip  home. There was lots of delicious eats, game playing, and down time. I can't wait for Christmas! According to my mom, I apparently didn't cook or bake as much as expected, but I finally got the itch yesterday, and baked these incredible muffins. 

These muffins truly epitomize holiday baking, and are probably one of the best I've ever made. They were ultra moist and full of flavor. I especially loved the bursts of fresh cranberries. I was supposed to bring them back to Cinci with me for the drive and for the school week, but I was a dummy and left them at home. At least I now have an excuse to make them again right away!

I'm also submitting this to Bake Your Own Bread. It's been a while, so I'm happy to contribute this month! :)
BYOB 125 x 125
Cranberry Orange Pumpkin Muffins

Ingredients

1 1/2 cups flour
1 teaspoon baking powder
1/2 teaspoon baking soda
1/2 teaspoon salt
1/2-1 teaspoon ground cinnamon (ohhh yeah)
1/2 teaspoon pumpkin pie spice*
1/4 teaspoon ginger 
1/2 can pumpkin puree (NOT pumpkin pie mix)
1 cup sugar
1/4 cup brown sugar**
1/3 cup vegetable oil
2 large eggs
1 teaspoon vanilla
Zest of half an orange
6 ounces (half a bag) fresh cranberries, rinsed and patted dry
1 tablespoon flour
1/4 cup pecans, chopped

Directions

Preheat oven to 350F. Line or lightly grease muffin tins.

Combine flour, baking powder, baking soda, salt, and spices in a medium bowl. In a larger bowl, add pumpkin, sugars, oil, eggs,vanilla, and orange zest; stir until well combined. Add the flour mixture to the pumpkin mixture, and stir until just combined. Do not over mix. 

In a small bowl, toss the tablespoon of flour with the cranberries. Gently fold cranberries and pecans into the batter. 

Fill muffin cups 2/3 of the way full and bake for 25 to 30 minutes or until toothpick inserted into the center comes out clean. Cool in the pan for a few minutes, then remove and allow to cool on a wire rack.

*My mom didn't have all of the spices, so I improvised with a little pumpkin pie spice. Feel free to check out the original recipe if you want to see other options!

**I also sprinkled a little on top for extra crunch. Loved it! :)

Recipe source: adapted from Crepes of Wrath

Thursday, November 22, 2012

Happy Thanksgiving!

I don't know about you all, but I am still recovering from all the food I inhaled this afternoon! I am thankful for countless things, but I'm especially thankful for all the wonderful people in my life. I hope you all had a glorious Thanksgiving with lots of laughter, love, and of course delicious food. Happy Turkey Day! Gobble Gobble :)


Thursday, November 8, 2012

Ginger Molasses Pumpkin Bread


As promised, here comes the pumpkin! This loaf is perfect for breakfast, and in my humble opinion, best served with a piping hot cup of tea. It's not at all too sweet, which I like, and when you get a bite with the fresh ginger, it's a welcome surprise. I think it tastes even better the next day! Stay warm, and enjoy! 

Ginger Molasses Pumpkin Bread 

Ingredients

2 and 1/2 cups flour
1/2 tsp baking soda
1 tsp baking powder
1 tsp salt
2 tsp ground cinnamon
1 tsp ground ginger
A pinch of ground nutmeg
1 egg
1 cup canned pumpkin
1/2 cup dark brown sugar
2 tbsp butter, melted
1/4 cup vegetable oil
1/4 cup molasses
1/2 cup buttermilk
1 tbsp chopped fresh ginger
1 tsp vanilla extract

Directions

Preheat the oven to 350. Butter and flour a 9" x 5" loaf pan.

In a large bowl, mix the flour, baking soda, baking powder, salt, cinnamon, ground ginger and nutmeg.


In another bowl, blend the egg, pumpkin, sugar, butter, oil, molasses, and buttermilk. Stir until well blended, then add the ginger and vanilla extract.

Pour the wet ingredients into the dry and stir until just mixed. Do not over mix. Pour the batter into your prepared loaf pan. 

Bake until a toothpick comes out clean (about 45 minutes). Let the pumpkin bread cool in the pan for about ten minutes, then remove to cool completely on a wire rack.  

Recipe Source: adapted from Omnivorous 

Friday, October 26, 2012

Baked Rigatoni with Chicken Sausage

Um...so what happened to October? Is my favorite month of the year nearly over?? NOOOO. I'm pretty sure I just made pumpkin pancakes last week, not two and a half weeks ago, and why have I not been consuming all things pumpkin every day since? I'll have to get on that.

Though I am a sucker for soups and stews when it cools down outside, I gotta say, I love baked pasta. I especially love this baked pasta. I first had this dish when I visited home last year during the Chinese new year, and have been aching to make it ever since. I bought gorgeous pesto chicken sausage from Findlay Market specifically for occasion. It did not disappoint. 

An added bonus about this recipe is that it yields two separate casseroles, and one can be put in the freezer to bake later on...MAJOR perk for a doctoral student. The dish in the photos are of the second batch that was frozen. I didn't read the directions very well and went ahead and baked it, then froze it, which you're not supposed to do. It was just a little more crunchy on top, so if you make this, it'll look a little different. It was of course still delicious. 

Ugh, this is putting my current dinner to shame. Enjoy!

Ingredients

Coarse salt and ground pepper
1 tablespoon olive oil
1 medium red onion
4 cloves garlic, minced
1/4 cup vodka (optional)
1 28-ounce can crushed or diced tomatoes
1/2 teaspoon dried oregano
1/2 cup heavy cream or half and half
1 pound rigatoni
10 ounces frozen spinach (excess liquid removed)
12 ounces smoked chicken sausage, halved lengthwise and sliced 1/4 inch thick
6 ounces mozzarella cheese, 4 ounces cut into 1/2 inch cubes and 2 ounces coarsely grated
1/4 cup Parmesan cheese

Directions

Bring a large pot of salted water to a boil. Heat oil in a large skillet over medium heat. Add onion; cook until translucent, about 3 minutes. Stir in garlic. Remove from heat; add vodka, if desired, and return to heat cooking until almost evaporated, about 1 minutes

Stir in tomatoes and oregano, and cook until tomatoes are falling apart, about 10 minutes. While that's simmering away, squeeze excess liquid from spinach and add to the pot. Cook for another 5 minutes. Add cream, and cook until warmed through, about 5 minutes. Season sauce with salt and pepper.

Meanwhile, preheat oven to 400F. Cook pasta in the boiling water until al dente, according to package instructions. Drain, and return contents to pot.

Add tomato sauce, sausage, and cubed mozzarella to the pot, tossing to coat. Season with salt and pepper. Divide evenly between two shallow 1 1/2 quart baking dishes. 

Top with grated mozzarella and Parmesan. Bake until browned and edges are crisp, 20-30 minutes. 

Freezer friendly: like I said above, one of the dishes can be frozen for up to 3 months! If you plan on freezing, stop once you put the pasta/tomato mixture in the baking dish. This means do not add the grated cheese yet. Allow the dish to cool, then wrap tightly in plastic wrap, and place in the freezer. Once ready to eat, remove from the freezer, add the grated cheese, cover with aluminum foil, and bake at 400F for 1 1/2 to 1 3/4 hours. Remove foil, and bake for an additional 20-30 minutes, or until browned. Do not thaw before baking. 

Recipe Source: adapted from Martha Stewart

Saturday, October 6, 2012

Pumpkin Pancakes with Cinnamon Syrup

Pumpkin and cinnamon. I think those are my two very favorite fall flavors, and this morning, they came together to create a totally stellar breakfast. When I woke up this morning, my original plan was to attempt a pumpkin spice latte (coming soon!). However, the second that can of pumpkin came open, I changed my mind. I wanted to eat something with pumpkin instead of putting it in my coffee.  The problem though, is that I didn't have maple syrup. Then, it occurred to me that I pinned something on Pinterest a while back about cinnamon syrup, and I was on it. Minutes later, I was scarffing down these beautiful, hearty pancakes, with this incredible syrup. Thankfully the syrup made A LOT, so I'll have some to add to my leftover pancakes, or even ice cream. Doesn't that sound good...mmm.

Pumpkin Pancakes with Cinnamon Syrup

Ingredients

Pancakes

3/4 cup milk
1/2 cup pumpkin puree
1 egg
1 tablespoon vegetable oil
1 tablespoon apple cider vinegar 
1 cup all-purpose flour
1 1/2 tablespoons brown sugar
1 teaspoon baking powder
1/2 teaspoon baking soda
1/2 teaspoon ground cinnamon
1/2 teaspoon ground allspice
1/4 teaspoon ground ginger
1/4 teaspoon salt

Cinnamon Syrup

1/2 cup white sugar
1/2 cup brown sugar
2 tablespoons flour
1 1/2 teaspoons ground cinnamon
1 teaspoon vanilla
1 cup water

Directions

In a bowl, mix together the milk, pumpkin, egg, oil and vinegar. In a separate bowl, combine the flour, brown sugar, baking powder, baking soda, allspice, cinnamon and salt. Stir into the pumpkin mixture just enough to combine. 

Heat a lightly oiled griddle or frying pan over medium high heat. Pour or scoop the batter onto the griddle, using approximately 1/4 cup for each pancake. Brown on both sides.

While the pancakes are cooking, prepare the syrup. Stir all ingredients together in a small saucepan. Over medium heat, stir occasionally until boiling. Let it boil for a few minutes while stirring until it thickens. Remove from heat and drizzle over pancakes. NUM.

Yields 6 large pancakes (I made 9 smaller ones).

Recipe Source: Love to Cook

Wednesday, October 3, 2012

Creamy Carrot and Sweet Potato Soup

I have a very special place in my heart for this soup. When I was playing in the symphony up in Kalamazoo, Michigan (yes, it's a real place!) this was the first meal I had with my host Nancy. Nancy loves to cook, and I'm sure that if she were of my generation, she would likely be a food blogger as well. She rarely repeats a recipe, and staying with her inspired me to branch out of my comfort zone and try new things in the kitchen as well. Nearly every trip to Kalamazoo, I stayed with her, and we would always cook and look at the new Cooking Light magazine together.

I have made this soup several times since I first had it three years ago in her kitchen. I made some adaptations until I found the perfect balance of flavors. You would think the soup would be sweet, but it's not. Serve it with a grilled cheese sandwich or some bruschetta, and you have what I think is the perfect meal.

Creamy Carrot and Sweet Potato Soup

Ingredients

3 tablespoons butter, divided 
1 cup chopped onion 
1/4 teaspoon ground cinnamon 
1/4 teaspoon ground nutmeg 
4 3/4 cups cubed peeled sweet potatoes (about 1 1/2 pounds) 
3 cups chopped carrot (about 1 pound) 
1 small apple, peeled, cored, and chopped 
2 1/2 cups water 
4 cups veggie or chicken broth 
1/4 cup half-and-half 
1/2 teaspoon salt 
1/4 teaspoon freshly ground black pepper 
1/3 cup reduced-fat sour cream 

Directions

Melt 1 tablespoon butter in a large Dutch oven over medium heat. Add onion to pan; cook 4 minutes or until tender, stirring occasionally. Stir in cinnamon and nutmeg; cook 1 minute, stirring constantly. Move onion mixture to side of pan; add remaining 2 tablespoons butter to open space in pan. Increase heat to medium-high; cook 1 minute or until butter begins to brown. Add sweet potatoes, carrots, apple, water, and broth; bring to a boil. Cover, reduce heat, and simmer 35 minutes or until vegetables are tender.

Place half of soup mixture in a blender. Remove center piece of blender lid (to allow steam to escape); secure blender lid on blender. Place a clean towel over opening in blender lid (to avoid splatters). Blend until smooth. Pour into a large bowl. Repeat procedure with remaining soup mixture. Stir in half-and-half, salt, and pepper. Ladle into soup bowls, and top each serving with about 2 teaspoons sour cream.

Recipe Source: Cooking Light-November 2009

Saturday, September 29, 2012

Whole Wheat Apple Muffins

IT'S FALL!!! That mean sweaters, BOOTS, cooler weather, brilliantly colored leaves, and lots of spice. Like most people, fall is my absolute favorite season. I just love everything about it! Before my huge obsession with all things pumpkin ensues, let's talk apples. There is something so magical about baked apples. I seriously think apple pie with vanilla ice cream is my absolute favorite dessert, and that's saying a lot coming from someone who will make herself ill eating chocolate (speaking of which, I've recently become obsessed with chocolate almond milk...num! Yay for chocolate milk that doesn't hurt my stomach!).   

These muffins completely hit the spot this morning. They are dark, moist, and soft with a nice little crunch on top from the dark brown sugar. Perfect for a lazy Saturday morning with me and my honey. 

Update: I just submitted this to BYOB (Bake Your Own Bread)!

Whole Wheat Apple Muffins

Ingredients

1 cup whole wheat flour
1 cup all-purpose flour
1 teaspoon baking powder
1 teaspoon baking soda
1/4 teaspoon salt
1 tablespoon cinnamon
1/2 cup (1 stick) unsalted butter, room temperature
1/2 cup granulated sugar
1/2 cup dark brown sugar, packed, divided
1 large egg lightly beaten
1 cup sour cream (or buttermilk, or yogurt)
2 large apples, peeled, cored, and coarsely chopped (I prefer granny smith)

Directions

Preheat oven to 450F. Line or grease a muffin pan, and set aside.

Mix together flours, baking powder, baking soda, salt, and cinnamon and set aside. In a separate bowl, cream the butter, then add the granulate sugar and a 1/4 cup of the brown sugar. Beat until fluffy. Add the egg and mix well, stopping once to scrape the bottom and sides of the bowl. Gently mix in the sour cream, do not over-mix. Stir in the dry ingredients, then gently fold in the apple chunks.

Divide the batter evenly among the prepared muffin cups, sprinkling the remaining 1/4 cup brown sugar on top (the muffin cups should be pretty full). Bake at 450F for 10 minutes, turn the heat down to 400F, and bake for an additional 5-10 minutes, or until a toothpick inserted into the center of a muffin comes out clean. Cool the muffins for 5 minutes in the pan, then turn them out on a wire rack to cool completely.

The recipe says it yields 12 muffins, though I got 19. My muffin cups are also on the small side.

Recipe Source: Smitten Kitchen, who adapted it from King Aurthur Flour

Saturday, September 22, 2012

Apple Dijon Kale Salad

I told you I had more green recipes up my sleeve, and this one is awesome. It's fruity and full or superfoods (literally: walnuts and kale? c'mon!). A few commenters at Budget Bytes thought the dressing was too vinegar-y. I thought it was great as it was, but maybe start with half and add more until you get the right balance for you. 

This salad makes a fair amount, roughly four main courses, but fear not, it keeps really well thanks to the hearty kale. I just had leftovers for lunch today, and it was even better then last night. The dressing also prevents the apples from browning, so that's not an issue either! I just love eating salads like this one. I always feel so good, knowing I'm eating something good for my body. I must admit though, now that it's starting to cool down outside, I'm quite looking forward to hot soups and comfort food more than salad! Enjoy!

Ingredients

For the dressing:

1/3 cup olive oil
1/4 cup apple cider vinegar
1 clove garlic
1 1/2 tablespoons dijon mustard
1/4 teaspoon salt
10-15 cranks fresh cracked pepper 

For the salad:

1 bunch kale
1 medium granny smith apple
1/4 cup raisins
1/2 cup chopped walnuts 

Directions

Tear the kale leaves from the stems. Cut the leaves into thin slices and then rinse well under cool water (in a colander). Allow the kale to drain as you prepare the rest of the salad.

In a blender combine the olive oil, apple cider vinegar, dijon mustard, clove of garlic, salt, and pepper. Blend until the garlic is minced and the dressing is smooth.

Wash the apple and chop it into chunks. Make sure the kale is as dry as possible and then combine it in a large bowl with the apples, walnuts, and raisins. Pour the dressing on top, starting with half, and toss to coat. Add more dressing as desired

Recipe Source: Budget Bytes 

Sunday, September 16, 2012

Crustless Spinach and Mushroom Quiche

Can you tell I've been trying to get more spinach into my diet since I got back from China? I have two bags of frozen spinach in the freezer and a bag of fresh in the fridge! The fact is, I love spinach, and it was one of those things I had a hard time finding in Beijing.

This quiche is loaded with spinach and was quite tasty the way I made it, but you could easily sub or add whatever you want. Kale? Peppers? Um...bacon? (yes please!) Just be sure that whatever you do, you get as much moisture as possible out of the veggies. Fresh from the oven, mine was barely wet on the bottom, which didn't really bother me. This wasn't an issue the following day(s).

I'm also trying to get more greens into my diet, so stay tuned for more green recipes!

Ingredients

10 ounces frozen chopped spinach, thawed 
8 ounces fresh mushrooms
1 garlic clove, minced
4 eggs
1 cup milk
2 ounces feta cheese
1/2 cup shredded mozzarella 
Salt and pepper to taste

Directions

Preheat your oven to 350 degrees. Squeeze as much water as you can out of the thawed spinach. I used paper towels to absorb the water, though you could also use a dishtowel to ring the water out.

Quickly rinse the mushrooms and slice them thinly. Place the sliced mushrooms in a skillet coated with non-stick spray, and sprinkle a little salt and pepper. Turn the heat on to medium-high and saute the mushrooms until they release all of their moisture and no more water remains on the bottom of the skillet, about 5-7 minutes. Add the garlic about a minute or two before the mushrooms are done.

Spray a pie dish with non-stick spray. Spread the spinach out on the bottom of the pie dish. Next add the cooked mushrooms and crumbled feta.

In a medium bowl whisk together the eggs until fairly smooth. Add the milk, 1/4 cup of the mozzarella, and another small sprinkle of pepper. Whisk to combine. (This step can be completed while the mushrooms are cooking). Pour this mixture into the pie dish over the spinach, mushrooms, and feta.

Sprinkle the rest of the mozzarella cheese over top. Place the quiche into the preheated oven and bake until it is golden brown on top and the center is solid. Every oven is different but this should take between 45 minutes and an hour.

Recipe Source: Budget Bytes

Thursday, September 6, 2012

Coconut Oatmeal Chewies

Let me start out by saying I have been saving this recipe for months. I adore coconut, and was pretty miffed to see that a bag cost nearly $5 at the expat stores in China. I just couldn't make myself pay that much for it while I was there. So, I lived without. That's why during my first shopping trip in Cincinnati, I scooped up a bag ($1.60...heck...yes), with intentions of making these immediately. One month later (heh), I finally got around to it. Thank you Labor day weekend! :)

I'm so so happy that I finally made these, and am also pretty stoked that I froze a batch for later. They were ultra chewy and I loved the toasted coconut taste. Even Chris gobbled them up, and he supposedly hates coconut. I don't see how that's possible, but whatever. Bottom line: if you love coconut, make these. If you don't love coconut, make these. They may change your mind!

Oatmeal Coconut Chewies

Ingredients

1 cup granulated sugar
1 cup brown sugar
2 eggs
1 cup (2 sticks) butter, softened to cool room temperature
2 teaspoons vanilla
1 teaspoon baking soda
1 teaspoon baking powder
1/2 teaspoon salt
2 1/2 cups flour
1 cup shredded, sweetened coconut
1 cup quick oats

Directions

Preheat the oven to 350F.

In a large bowl cream together the sugar, eggs, butter and vanilla until light and fluffy. Add the dry ingredients and mix until combined.

Drop by tablespoonfuls onto a greased or lined (silpat or parchment) baking sheet. Bake at 350F for 9-11 minutes, until the cookies are set but not overly browned (bake a few minutes longer for a crispier version). Remove from oven, and let cool on the cookie sheet for three minutes, before transferring them to a rack to cool completely.

Recipe Source:  Mel's Kitchen Cafe

Saturday, September 1, 2012

Quinoa Stuffed Bell Peppers


Enter freezer friendly dish numero dos. I was super excited to try this dish, as it was my first time ever trying quinoa (pronounced keeeen-waaaahhh). Hearty and filling, not to mention totally delicious, I could only eat half a pepper and I was stuffed.

The prep was a bit more time consuming than I would've liked, but the end result was worth it. It had so much flavor! I adapted the recipe a bit, to make it work with what I had on hand. I used mozzarella as I didn't have pepper jack, and added a jalapeno pepper (for flavor! it's not spicy I promise). Next time, I would love to try pepper jack, because I think it would be ultra tasty. Also, the original recipe says this yields 8 servings (4 whole peppers, halved). They must have tested this recipe with HUGE peppers, because I had about 2 cups of stuffing left over. If that happens, just pop it in the freezer, and you can stuff more peppers later.

The rest of the peppers are now on their way to the freezer. It's nice to know that in the coming weeks I'll have a super healthy meal waiting for me when I get home from a busy day at school! Enjoy!

Ingredients

1 medium onion, finely chopped (1 cup)
2 Tbs. olive oil
2 ribs celery, finely chopped (½ cup)
1 jalapeno pepper, finely chopped
2 teaspoons ground cumin
2 cloves garlic, minced 
1 10-oz. package frozen chopped spinach, thawed and squeezed dry
2 15-oz. cans diced tomatoes, drained, liquid reserved
1 15-oz. can black beans, rinsed and drained
¾ cup quinoa, rinsed
2-3 large carrots, grated (1 ½ cups)
1 ½ cups grated pepper Jack or mozzarella cheese, divided
4 extra large red bell peppers, halved lengthwise, ribs removed

Directions
 
Heat oil in saucepan over medium heat. Add onion and celery, and cook 5 minutes, or until soft. Add cumin and garlic, and sauté 1 minute. Stir in spinach and drained tomatoes. Cook 5 minutes, or until the liquid has evaporated.

Stir in black beans, quinoa, carrots, and 2 cups water. Cover, and bring to a boil. Reduce heat to medium-low, and simmer 20 minutes, or until quinoa is tender. Stir in 1 cup cheese. Season with salt and pepper, if desired.

Preheat oven to 350°F. Pour liquid from tomatoes in bottom of baking dish.

Fill each bell pepper half with heaping 3/4-cup quinoa mixture, and place in baking dish. Cover with foil, and bake 1 hour. Uncover, and sprinkle each pepper with 1 Tbs. remaining cheese. Bake 15 minutes more, or until tops of stuffed peppers are browned. Let stand 5 minutes. Transfer stuffed peppers to serving plates, and drizzle each with pan juices before serving.

Recipe Source: Vegetarian Times

Monday, August 20, 2012

Spinach Feta Turkey Burgers

I can't believe it's been a whole month since my last post! In my defense, I moved AGAIN, was out of town for a week, and didn't get internet until yesterday (does happy dance!!). I still haven't unpacked all of my things, though I've been trying to do a little bit each day. My kitchen however, has been unpacked and functioning since maybe my second or third day back in Cinci. I have no idea where my tools or clothes are, but I can tell you the exact location of all my kitchen utensils and appliances.

I've been doing some cooking, but between unpacking and preparing for an audition and school, cooking has been on the back burner. Since school starts a week from tomorrow, I plan on preparing several meals that can be frozen, so if I'm short on time, I have something homemade and ready to go! These turkey burgers were the first on my list. I simply froze the patties I wasn't cooking on a parchment lined cookie sheet, then threw them in freezer bags once they were solid.* I made them yesterday for lunch, and they were totally delish. Let's just say in the two minutes I was taking pictures of mine, Chris had prepared his, eaten it, and put his dish in the sink. Either he was starving, or he loved them.

Not only were these tasty, they were also super quick to make. Even if I was short on time during the week, I could have these going in no time. I adapted the original recipe a tad, by adding garlic and fresh oregano (from my balcony garden!!), which I think were excellent additions. The only thing I would do differently next time is perhaps get some of the moisture out of the spinach, as the burgers were a bit on the soft side. I ended up freezing them for 10-15 minutes before cooking, so they'd hold together, as was recommended by others who had tried the recipe.

Bottom line, these put plain old turkey burgers to shame, and I'm super stoked that I have another three in my freezer!

Spinach Feta Turkey Burgers

Ingredients

1 lb. ground turkey
1 egg, lightly beaten
5 oz. frozen spinach, defrosted (about half a bag)
3/4 cup feta cheese
1 clove finely minced garlic
A few sprigs of fresh oregano, chopped (optional)
1 teaspoon salt
Pinch of pepper

Directions 

Using paper towels, remove excess liquid from defrosted spinach.**

Mix all ingredients with your hands or a wooden spoon, and form patties. If patties are too soft, put them in the freezer on a parchment lined cookie sheet for about 10-15 minutes. Cook patties in a greased skillet over medium-high heat for about 6 minutes per side, or until meat is fully cooked. Serve with hamburger buns, lettuce or spinach, tomato, red onion, and oh yeah, Dijon mustard on these is awesome. Do you know what's even more awesome then all of those toppings? More feta on top. Yeah.

The original recipe said this yields 4 medium patties, but I ended up with 5 large patties.

*When I want to eat them, I plan on letting them thaw just a few minutes then throwing them on the grill or skillet, just like I would a regular hamburger.

**I didn't remove the excess liquid from the spinach. They were a tad on the soft side, but obviously didn't bother me at all. If you're worried about it, go ahead and remove some of the moisture.

Recipe Source: Eat Live Run

Sunday, July 22, 2012

Texas Cake

I'm so excited to finally have a cake recipe to post...but I'm even more excited that it's a chocolate cake. I ran out of cocoa powder about two or three months before my planned departure from Beijing, and being that it's very expensive out there I chose not to buy any more. That meant no baking with chocolate. For over two months. It was a very dark time in my life.

Now that I'm back in the states there has been a lot of chocolate consumption in this household, this texas cake being the most recent, and yes, the most delicious. We had this cake all the time growing up, and I can't remember the last time I had it. I've been helping out at home with a garage sale all weekend, so meals weren't really a priority. I actually had this cake for lunch today, along with some watermelon...I know...weird.

I'm not sure why we always called this cake Texas Cake, but the pioneer woman thought it was because the cake is the size of Texas (hellooo 13x18!!). We used her recipe, because it looked the closest to what we've always done, but did it in a 9x13 instead.

In other news, this week I'll be moving yet again, back to Cincinnati. I'm so excited to just be in one place for a while, and to see some of my old friends again. Maybe another cake should be in order? I think so!


Texas Cake

Ingredients

For the cake:

4 heaping tablespoons cocoa
2 sticks butter
1 cup boiling water
2 cups flour
2 cups sugar
1/4 teaspoon salt
1/2 cup buttermilk (you could also give sour cream a try!)
2 eggs
1 teaspoon baking soda
2 teaspoons vanilla

For the frosting:

1/2 cup finely chopped pecans
1 stick butter
4 heaping tablespoons cocoa
6 tablespoons milk
1 pound minus 1/2 cup powdered sugar. This is kind of a loose measurement, add bits at a time until it's the desired consistancy. Any lumps will eventually break up, no need to sift.

Directions

Preheat oven to 350F.

In a saucepan, boil water, then add butter and cocoa. Bring back to a boil, and let it boil for 30 seconds, then turn off heat. Mix in the sugar until combined, then add the flour and salt, stirring lightly to cool.

In a measuring cup, wisk together buttermilk, eggs, vanilla, and baking soda. Pour into the chocolate mixture.

Pour into a lightly greased 9x13 pan, and bake for 25 minutes. Cake should look just set, but not jiggly.

While cake is baking, make the icing. Melt butter in a saucepan. Add cocoa, stir to combine, then turn off heat. Add the milk, vanilla, and add the powdered sugar in batches until it reaches the desired consistancy. Stir in the chopped pecans, and pour over warm cake.

So easy, so addicting, SO delicious.

Recipe Source: The Pioneer Woman
Related Posts Plugin for WordPress, Blogger...